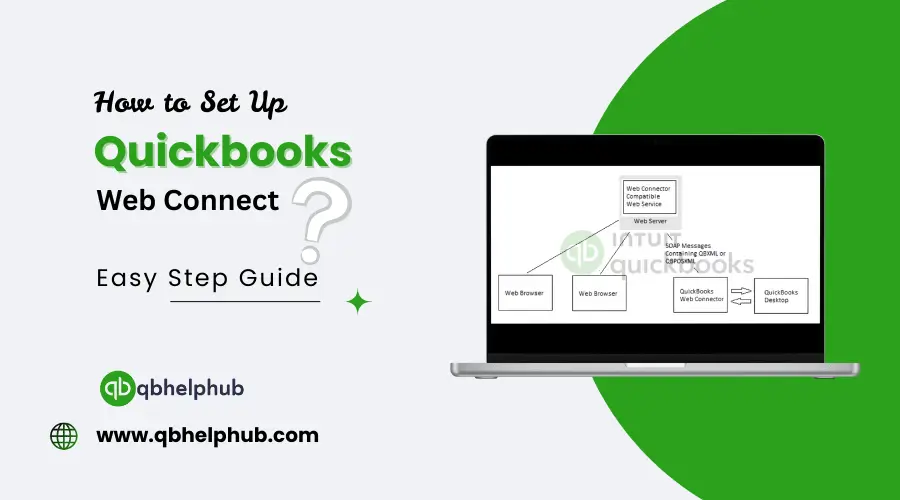
If you’ve been manually entering bank transactions into QuickBooks, you probably know how time-consuming it can get. The good news is that QuickBooks Web Connect lets you bring in transactions from your bank with just a few clicks. No more typing each one. No more worrying about missing something important. But here’s the catch, getting QuickBooks Web Connect setup for the first time isn’t always super easy. Whether you’re just starting out or you’ve been using QuickBooks for a while but never tried this feature, we’re going to walk through the whole process in easy language through this guide. plain English.
Read Also: How To Pay Yourself in QuickBooks When You Own an LLC?
First Things First: Know What Web Connect Does
So, what exactly is QuickBooks Web Connect?
Think of it like a bridge. It doesn’t automatically sync with your bank the way some apps do, but it does let you download a file from your bank and then import it into QuickBooks Desktop. That file (which ends in .QBO) contains a list of your recent transactions. Once you bring it into QuickBooks, you can review, match, and categorize each one.
This is especially handy if:
- Your bank doesn’t support live syncing with QuickBooks
- You prefer downloading transactions yourself
- You want more control over your financial data
It’s not fancy, but it works, and once you’ve done it once, you’ll wonder why you didn’t start sooner.
Make Sure Your Bank Supports It
Before you do anything else, you need to find out if your bank even offers Web Connect. Not every financial institution does, and some limit it to specific account types.
To check:
- Log into your bank’s website
- Look for an option to download account activity or transactions
- See if “QuickBooks (.QBO)” is listed as a file format
If you see that option, you’re in good shape. If not, you might need to contact your bank or see if there’s a different way to pull your data.
Download Your Transactions
Once you’ve confirmed your bank supports it, you’re ready to grab your transactions.
Here’s what to do:
- Log into your bank’s website from a regular browser (not QuickBooks)
- Find your account, and look for a “Download” or “Export” button
- Choose .QBO or Web Connect as the file type
- Select a time range (usually the last 30 days or since your last download)
- Save the file somewhere easy to find, your desktop is a safe bet
Tip: Don’t choose CSV or Excel, those won’t work with QuickBooks Web Connect.
Open Your QuickBooks Desktop Software
With your .QBO file ready, it’s time to head into QuickBooks Desktop.
Make sure:
- You open the correct company file
- You know which bank account you want to bring these transactions into
If the bank account is already set up in QuickBooks, perfect. If not, don’t worry, you’ll get a chance to create it during the import.
(Optional But Smart) Create a Backup First
QuickBooks isn’t perfect. Hence, to be safe, it’s always a good idea to create a backup before importing anything.
Here’s how:
- Go to the File menu
- Click on Back Up Company > Create Local Backup
- Follow the steps and save the backup somewhere secure
It takes just a few minutes, and if something gets messed up later, you’ll be glad you did it.
Read Also: Why does Intuit offer 27 different versions of Quickbooks?
Bring That .QBO File Into QuickBooks
Now we’re getting to the good part, importing the actual data.
Here’s how to do it:
- In QuickBooks, go to File > Utilities > Import > Web Connect Files
- Find the .QBO file you downloaded earlier
- Select it and click Open
- QuickBooks will ask which account to link the transactions to, pick the right one or create a new one if needed
- Click Continue, then OK once you see the confirmation message
That’s it. You’ve just pulled your bank transactions into QuickBooks. Well done.
Review, Categorize, and Clean Things Up
Importing the file doesn’t automatically add everything to your books. Instead, QuickBooks lets you go through each transaction so you can match it, categorize it, or even split it if needed.
Here’s where to go:
- Banking > Bank Feeds > Bank Feeds Center
- Pick the correct account
- You’ll see a list of “Downloaded Transactions” waiting for review
You’re basically telling QuickBooks what each transaction was for, office supplies, client payments, vendor bills, etc. The more accurate you are here, the better your financial reports will look later.
Wrap It Up With a Reconciliation
Once you’ve added or matched all the transactions, it’s time to reconcile. This means checking that your QuickBooks balance matches what’s on your actual bank statement. If your ending balance matches what’s on your statement, you’re good. If not, look for any missing entries, duplicate imports, or incorrect dates.
Conclusion
Getting QuickBooks Web Connect up and running might seem like a hassle the first time around, but once you’ve done it, it becomes second nature. This small setup step can save you hours of manual data entry, not to mention reduce mistakes and improve the accuracy of your books. With a little patience and some practice, you’ll be importing transactions like a pro, and wondering why you didn’t make the switch sooner.
Get In Touch with Us
If you are interested to know more about QuickBooks and basic troubleshooting steps, we are here to help you through our dedicated customer service team. Fill out the customer response form or feel free to reach to us at support@qbsolved.com Our highly competent team is here to solve all your queries regarding QuickBooks.
FAQs (Frequently Asked Questions)