When borrowing money for your business, keeping track of it correctly is important. Whether the loan comes from a bank, or a government program, it’s still something you must record in the books. QuickBooks Online makes this part of accounting simple once we know how to do it correctly. The process is not complicated, but it does require setting things up the right way. This helps to make sure your reports stay accurate later. When a loan is set up properly, QuickBooks automatically tracks your loan balance. It also helps with tracking payments and interests without needing to do it manually. Let’s go through these steps in a clear and easy way to help you add any type of loan into your QuickBooks Online account.
Read Also: How to Print Checks in QuickBooks the Easy Way (Step-by-Step Guide)
Understanding How Loans Work in QuickBooks
When someone gets a loan, they receive money that they need to pay back later. In accounting, that’s called a liability, something the business owes.
In QuickBooks Online, users record that liability in a special account called a Loan Payable account. When the money arrives in the business bank account, QB will record it as a deposit linked to that loan account. Each time you make a payment, QuickBooks can separate the payment into two parts. First part reduces the principal balance and the other records interest expense.
This setup helps to keeps the financial reports accurate. The balance sheet will show the loan under liabilities. While the profit and loss statement will show the interest paid as an expense.
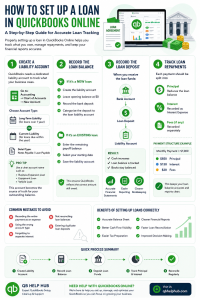
Step 1: Create a Loan Liability Account
First, the user needs to make a new account in QuickBooks for the loan itself. Think of this account as a folder that keeps all loan-related information in one place.
To do this, first navigate to the Chart of Accounts. Click the option to create a new account. You’ll see several types of accounts in the menu. Choose “Liabilities” because a loan represents money you owe. Then you need to choose the detail type. If you’ll repay the loan within one year, pick “Other Current Liabilities.” If the loan will take longer than a year, choose “Long Term Liabilities.”
Give your new account a name that’s easy to recognize, such as “Business Loan – ABC Bank” or “Equipment Financing.” You can add a short description to keep things organized. Once you save it, QuickBooks creates the loan account automatically.
Step 2: Record the Loan Funds You Received
When the lender gives you the money, it usually comes as a deposit in your business bank account. You need to show that in QuickBooks so the system knows where the money came from.
Go to the Banking section or the Chart of Accounts and choose the bank account where the funds arrived. Click “New Transaction” and select “Deposit.” In the section where you choose the account for the deposit, select the loan account you just created under liabilities.
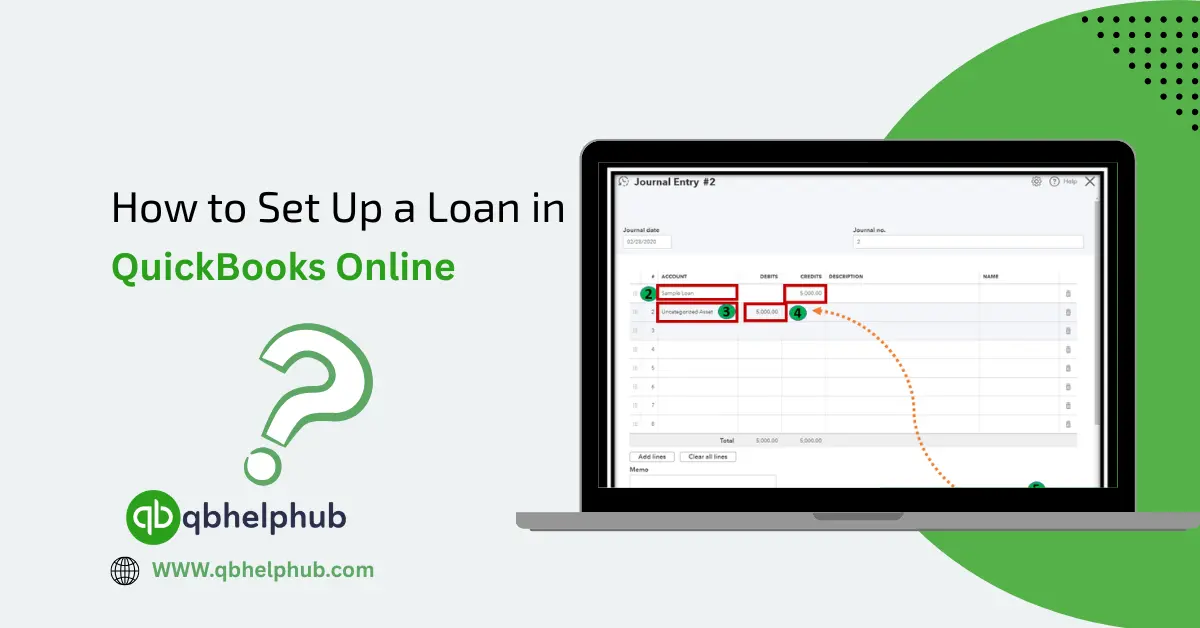
This tells QuickBooks that this deposit was not income, it’s borrowed money. Enter the amount you received, the date, and the lender’s name. Once you save the transaction, the deposit will show in your bank account. So, the same amount will appear as a balance owed in your loan account.
Read Also: QuickBooks Online for Construction Accounting: The Complete Guide
Step 3: Set Up the Lender as a Vendor
Even though the lender isn’t a supplier in the normal sense, it helps to add them as a vendor in QuickBooks. That way, you can record payments properly. Go to the Expenses tab, select “Vendors,” and click “Add Vendor.” Enter the lender’s name, address, and any notes you want to keep.
This step makes it easier later when you record your loan repayments. This is because QuickBooks will let the user choose this lender each time while making a payment.
Step 4: Record Each Loan Payment
When you make a payment on your loan, it usually includes two parts: principal and interest. The principal reduces the loan balance, and the interest is the cost of borrowing. QuickBooks lets the users record both parts, so that financial reports stay balanced.
Go to the + New button and choose “Check” or “Expense.” Choose your lender under “Payee” and the bank account from which you’re making the payment. In the “Category” column, choose your loan liability account. Then enter the amount that goes toward the principal. In the next line, choose “Interest Expense”. Then enter the interest amount from your loan statement.
If you’re not sure how much is principal and how much is interest, check your lender’s statement or payment schedule. Once you save the transaction, QuickBooks updates everything on its own. The loan balance decreases and the bank account shows the payments and profits. Whereas the loss report records the interest expense automatically.
Step 5: Track the Loan Balance
After recording payments, users should check the progress from time to time. Go to the Chart of Accounts and find your loan account. Click “View Register”, this page shows every transaction linked to the loan. the deposit you received, payments you made, and your current balance.
If the lender sends you monthly statements, you can match the remaining balance with what QuickBooks shows. If something doesn’t match, review your payment entries to make sure each amount is correct. Keeping this balance updated helps you stay in control of your finances. You’ll always know how much you still owe and how much interest you’ve paid over the time.
Step 6: Automate Future Payments
If you pay loans through automatic bank transfers, you can create recurring transactions in QuickBooks. This saves time and ensures you never forget to record a payment. Go to the “Gear” icon, select “Recurring Transactions,” and choose “New.” Then select the type of transaction, like “Expense.”
Fill in the lender’s name, the payment amount, and the categories for principal and interest. You can set the schedule to repeat monthly or as often as needed. QuickBooks will automatically record the payment each time according to your schedule.
Step 7: Review Reports Regularly
After setting everything up, it’s important to check your reports occasionally. The Balance Sheet will show the remaining loan balance under liabilities. The Profit and Loss Report will show interest under expenses. If you ever need to share financial statements with a lender or accountant, having this data accurate and updated makes everything easier.
Tips for Keeping Loan Records Accurate
Always keep copies of your loan agreement and payment statements. They help verify details if you need to adjust entries later. Try to record payments immediately rather than waiting for weeks. This is because small errors can grow quickly if missed.
Also, remember that interest may change over time if you have a variable-rate loan. Make sure to update the interest portion whenever your payment changes so your expense reports remain correct. If you refinance or pay off a loan early, you’ll record the final payment in the same way as others. Once the balance reaches zero, you can make the account inactive to keep your records clean.
Why Proper Loan Setup Matters?
Many small business owners skip steps when adding loans because they assume it’s only temporary. But incorrect setup can cause serious confusion later. Like if someone records the loan as income, the profit looks higher than it really is. This way, one could end up paying more in taxes.
QuickBooks is built to prevent these mistakes, but only if you use it correctly. Once you learn how to set things up the right way, you’ll notice how much easier tracking becomes. You can see at a glance how much debt your business carries. You can also check how much interest you’re paying, and how close you are to being debt-free.
Read Also: 7 Best Practices to Follow in QuickBooks Online for Better Accounting
To Conclude
Setting up a loan in QuickBooks Online is not as complicated as it sounds. Once you create a loan liability account, record the deposit, and start tracking payments correctly, everything falls into place. QuickBooks does most of the difficult work, keeping records clean and reports accurate. By separating principal from interest and keeping payments updated, you’ll always know where your business stands financially. Accurate records don’t just make bookkeeping easier. They also give a clear picture of the company’s health, helping you make better decisions for the future.
FAQs (Frequently Asked Questions)