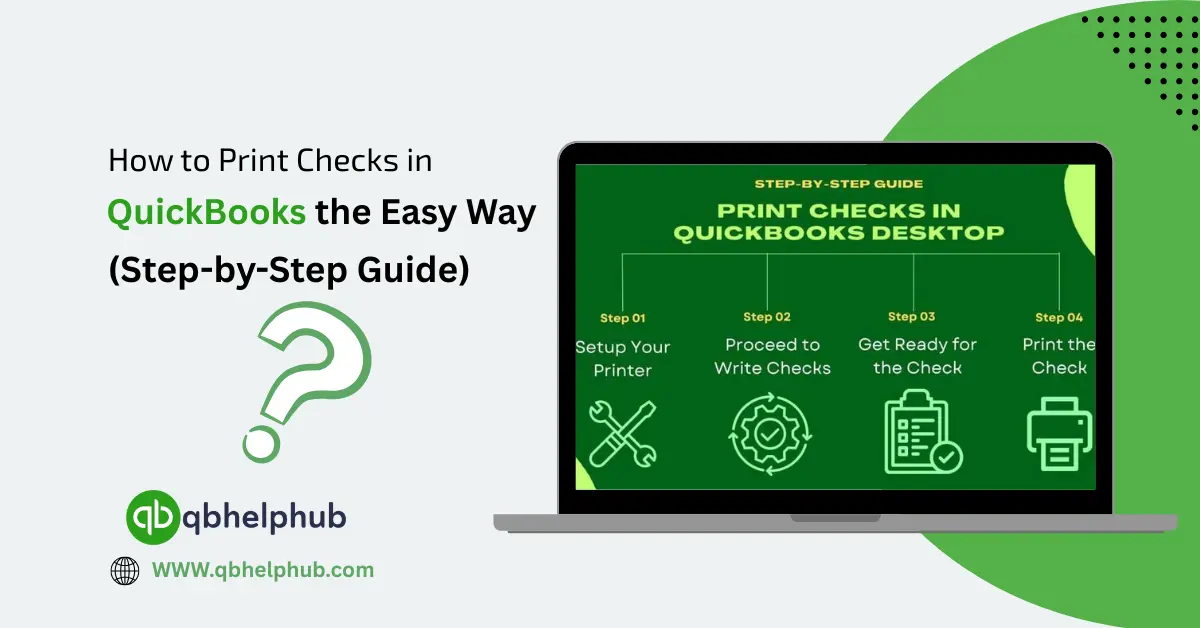
For small business owners, keeping track of payments is something really important. So, QuickBooks makes it easier to write, record, and print checks all from one place. Printing checks through QuickBooks is one of those things that can feel tricky at first. But once you’ve done it, it becomes one of the easiest tasks in the accounting routine. Whether you’re paying employees, vendors, or bills, QuickBooks can help you do it quickly. Now, through this guide, let us look at the step-by-step process of printing checks in QuickBooks and share a few common mistakes to help avoid them.
Read Also: How to Make Journal Entry in QuickBooks Online correctly?
Getting Started: What You Need Before Printing?
Before you hit the print button, there are a few small things to set up. These details make sure your printed checks look neat and align properly on the page. First, you need the check stock paper, this is a special paper designed for printing checks. One can easily buy it from QuickBooks or any office supply store. There are two main types: voucher checks (one check per page with stubs) and standard checks (three checks per page). Either one works; just make sure your QuickBooks settings match the type you have.
Next, check your printer, usually a regular inkjet or laser printer works well. Just make sure it’s loaded correctly and has enough ink, so the printed text is clear. Then, make sure that the company’s bank account information is entered in QuickBooks. This is the information that prints at the top of the check. Once you’ve got these ready, you’re all set to create and print checks.
Step 1: Record the Check in QuickBooks
QuickBooks doesn’t just print checks; it also keeps a record of every payment you make. That’s why your first step is to create a check in the system.
- Open QuickBooks and go to the Banking menu.
- Click Write Checks (in QuickBooks Desktop) or + New > Check (in QuickBooks Online).
- Choose the bank account you want the check to come from.
- Type in the payee’s name, this could be a vendor, employee, or anyone you’re paying.
- Enter the amount you want to pay.
- Fill in the date and memo field if needed.
When you save this, QuickBooks automatically records the check in your register. This way, your financial records stay clean and accurate. Also, you can see the payment whenever you review your books.
Step 2: Preview and Adjust Before Printing
Look closely at the payee’s name, the amount, and your bank details. If something looks off, you can fix it easily before wasting paper or ink.
For best results, print a sample check on plain paper first. Then, hold that sheet over your real check paper to check alignment. The printed text should line up perfectly with the boxes and lines on the check. If it doesn’t, QuickBooks gives you an option called Align Checks. You can also move the layout slightly up, down, left, or right until it fits. Many people skip this step and end up with checks that print misaligned.
Spending two minutes here saves a lot of time and paper later.
Read Also: Automating Recurring Transactions in QuickBooks Online and Desktop: Step-by-Step Guide
Step 3: Print the Check
Now that your check details are entered and your alignment looks fine, it’s time to print.
Go to File > Print Forms > Checks in QuickBooks Desktop. For QuickBooks Online, select the Print Checks option. You’ll see a list of all the checks that are ready to print. Choose the ones you want, then select your printer and check stock type.
Load the paper correctly into your printer. If it’s a laser printer, the printable side should face down; for inkjet, it’s usually face up. Click Print, and QuickBooks will send the checks to the printer.
Once printed, compare the check number in QuickBooks to the one on the paper. They should match. If one printed wrong or got jammed, void it in QuickBooks and reprint a new one.
Step 4: Record and Save for Future Reference
After printing, mark your check as printed in QuickBooks so the system updates your records. This step keeps your check register accurate and prevents duplicate check numbers. If you’re using QuickBooks Online, it automatically stores the check details in your transaction history, so you can always find it again.
Common Problems and Easy Fixes
Sometimes, things don’t go perfectly the first time and that’s normal, in fact most printing issues in QuickBooks are easy to fix.
If your checks print misaligned, go back to the Align Checks feature and adjust it slightly. Or if your printer skips pages, check that your check stock is loaded properly. If the print looks faded or blurry, your ink cartridge might be low.
Another issue is printing the wrong check numbers. Before you print, always double-check that the starting check number in QuickBooks matches the number on your check paper. This avoids confusion later during reconciliation.
Step 5: Reprint if Necessary
Sometimes a check gets jammed, misprinted, or damaged. QuickBooks makes it simple to reprint. Open the original check record, click Print Check, and select Reprint. Just make sure to void the old check so there’s no mix-up.
It’s always smart to use a pen to write “VOID” across any spoiled check before discarding it. That way, no one can accidentally use it.
Why Printing Checks in QuickBooks Saves Time
One of the biggest advantages of printing checks in QuickBooks is accuracy. When you write checks by hand, small mistakes can happen. Like the numbers can be written wrong, details missed, or amounts entered incorrectly. With QuickBooks, all your details are straight from your account, so there’s less chance for error.
It also saves time and energy than doing the work manually. You don’t need to fill out ledgers by hand or record each payment separately. Every printed check is automatically recorded in your books. At the end of the month, reconciling your accounts becomes much easier.
Printing also gives your business a more professional touch. Checks look clean, printed with your company’s name and logo. It’s a small detail that adds credibility, especially when paying vendors or clients.
Tips for Smooth Check Printing
If you print checks often, keeping a few small habits makes things even smoother. Always keep your check paper stored flat and dry, so it doesn’t jam in the printer. Make sure your printer settings in QuickBooks match the actual paper layout.
Another tip is to print checks in small batches instead of all at once. It reduces the risk of paper jams or errors. You can also customize your check template in QB to include your business logo. This small step can make your payments look more professional.
Lastly, always update your printer driver and QuickBooks software regularly. Updates often fix bugs that cause printing issues.
Managing Checks After Printing
Once your checks are printed and mailed, don’t forget to track them. In QuickBooks, you can easily mark them as cleared after they appear on your bank statement. This keeps your financial records accurate and up to date.
If a check remains uncashed for too long, reach out to the payee to confirm they received it. QuickBooks lets you check every payment’s status without going through piles of paperwork.
Some people also prefer to switch to Direct Deposit or Online Bill Pay through QuickBooks to save even more time. Still, printed checks remain a reliable option for vendors who prefer physical payments.
Security Tips for Printed Checks
Always store your blank check stock in a locked drawer or cabinet. Limit access to employees who handle accounting. Use MICR ink, if possible as it’s best for check printing purposes. After printing, review each check to make sure all information is correct before mailing or delivering it. QB also lets you assign user permissions so only certain people can print checks. This extra layer of control helps prevent unauthorized use.
Read Also: How QuickBooks Online Helps Businesses Simplify Accounting and Save Time?
To Conclude
Printing checks in QuickBooks may seem like a technical task, but once you’ve done it, it’s one of the easiest ways to manage payments for your business. It keeps your records organized, reduces errors, and saves valuable time. The steps are simple, record the check, align the print, verify the details, and print. It’s an efficient, reliable, and cost-effective way to handle business payments with confidence.
Get in Touch with Us
If you are interested to know more about QuickBooks Online and Desktop, we are here to help you through our dedicated customer service team. Fill out the customer response form or feel free to reach to us at support@qbhelphub.com Our highly competent team is here to solve all your queries regarding QuickBooks.
FAQs (Frequently Asked Questions)